How to Create MySQL Database using phpMyAdmin
Introduction
phpMyAdmin is a popular web-based administration tool used to administrate MySQL servers and databases. This tutorial illustrates how to create a new database and a new user to access that database on a MySQL Server using phpMyAdmin.
Prerequisites
1. You will require a root or DBA user login to the MySQL server, or a user login with permission to create new databases.
2. You will need to have access to an instance of phpMyAdmin appropriately configured to administrate the MySQL server.
3. If you require a dedicated web server running MySQL and phpMyAdmin please visit your Web Hosting Services page.
phpMyAdmin Version 3.5.1
In this tutorial, we are using phpMyAdmin Version 3.5.1. Your own version may be different but it should work fine.
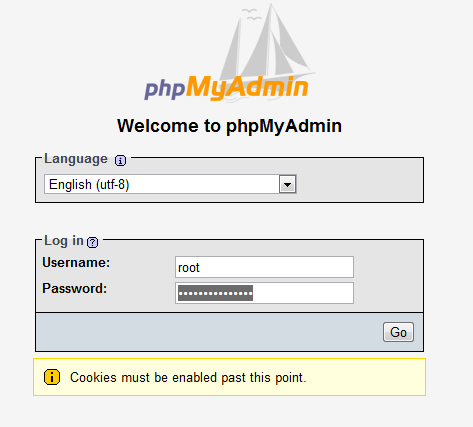
Browse to your phpMyAdmin URL using your Internet Web Browser, and login using your root or dba user login as shown.
From the main menu choose Databases

In the create database field type in a name for your database. Leave the collation drop down box if you wish to use the default MySQL schema collation. Click Create.

Your database will now be visible on the right hand side under the list of available databases. To setup a new user login to access this database, click on Users in the main menu. Choose the Add User option under the list of available server users.

In the section titledLogin Information - type in a username, localhost and a password in the fields as shown. Optionally you can press the Generate button to create a random password for you.

The section that relates to the users GLOBAL privileges are privileges you want to assign to this user which apply to ALL databases on the server. It is recommended that you do NOT assign these permissions unless you know exactly what you are doing. It is far more secure to assign seperate user logins to each piece of software or website that will require access to only a particular database. Therefore leave this section BLANK, and then click the Add User button.

After the user is created, you can see it listed on the Users page. Click Edit Privileges to assign access to a specific database.

Once again leave the Global Privileges section BLANK. Scroll down to the section titled Database-Specific Privileges. Choose the database you want the user to be able to access from the list, and click GO.

Assign the permissions as shown to provide the user with access to the given database. The following permissions are recommended for compatibility with most modern web-based software applications.

Click GO after selecting the relevant privileges.

If you click on the users Edit Privileges option now, you will see that new privileges for the specific database are now listed as belonging to the user.

Click the Logout option in the top left corner, and test your new user login with phpMyAdmin.

Testing Your User Login
Test your new user login by using it to login to phpMyAdmin.

If you can see your new database in the list of schema's on the left, then your new database and username is ready for use. Nice Job!

Congratulations!


Advertisement
Advertisement
Advertisement
-
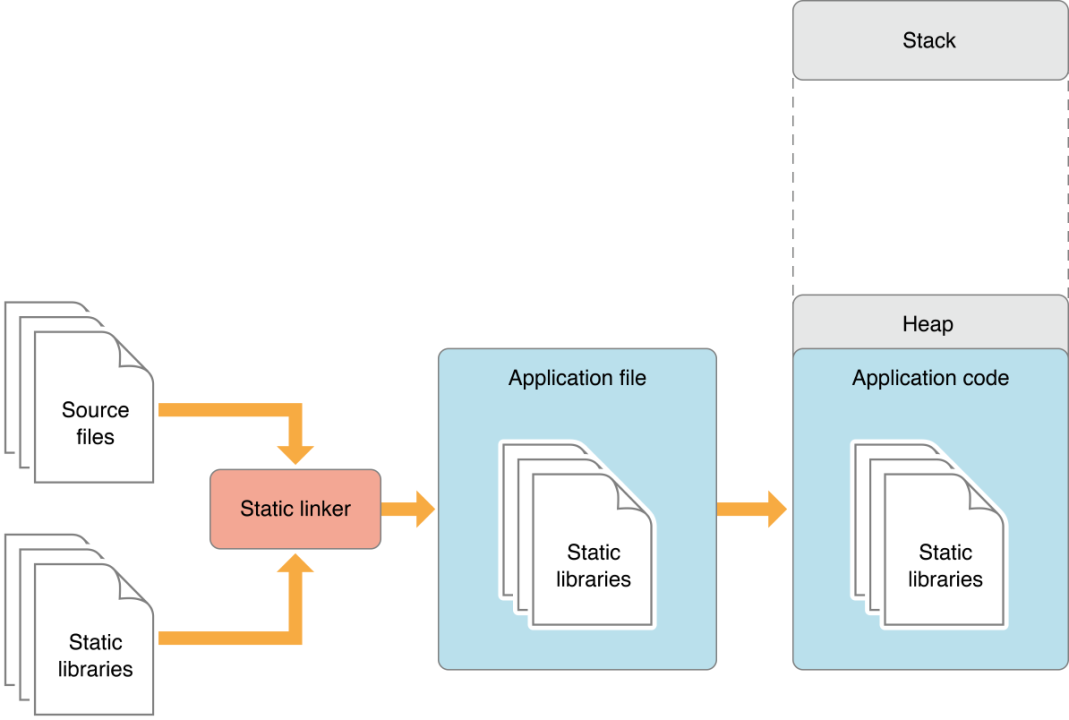 The differences between static and dynamic libraries
 -
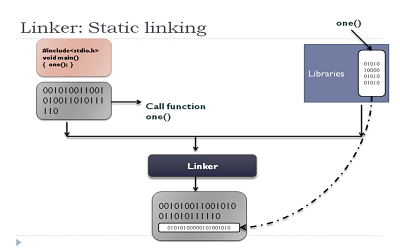 Creating and Consuming Static Library in C
 -
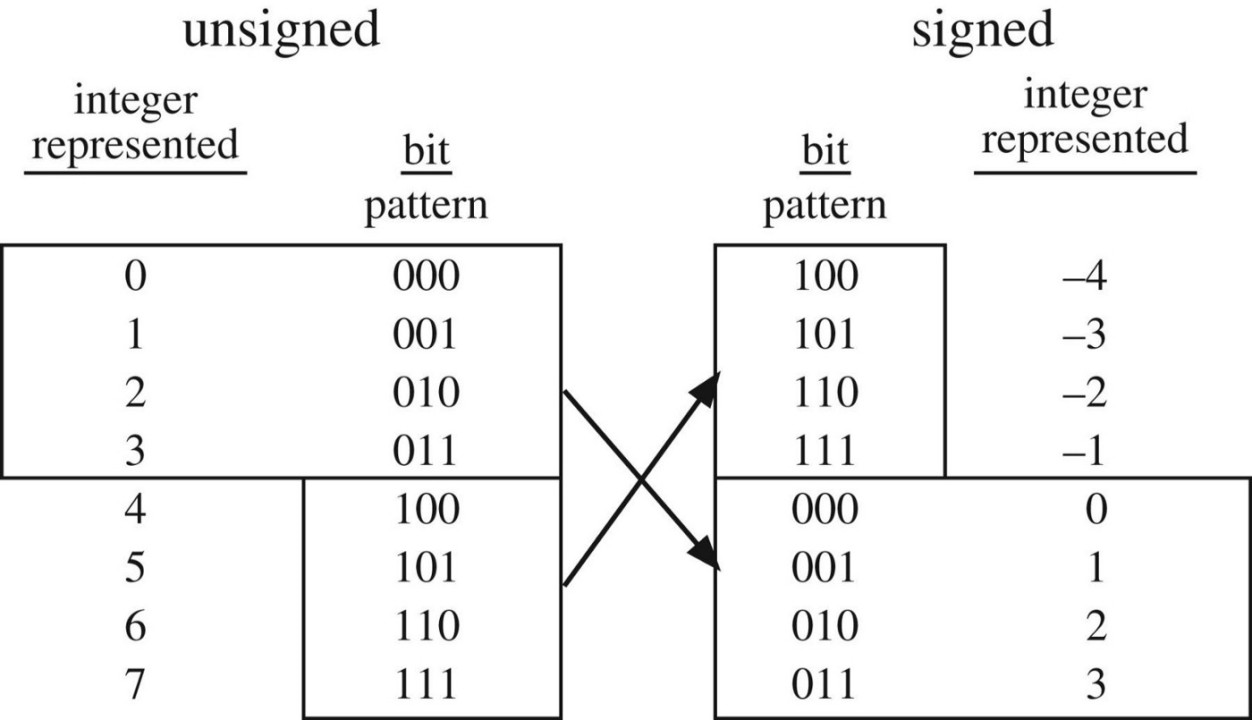 How integers are stored in memory using two's complement in digital computers
 -
 What happens when you type gcc main.c
 -
 What happens when you type any URL in your browser and press Enter
 -
 How I developed my personal portfolio website
 -
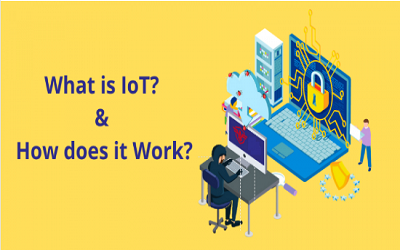 What is IoT?
 -
 Machine Learning